Here we will discuss Implementing Database Operations Using JDBC.

To begin with, first, have a look at the problem statement here.
https://www.programmingempire.com/a-mini-project-on-jdbc-operation/
https://www.programmingempire.com/jdbc-operations—insert-records-and-display/
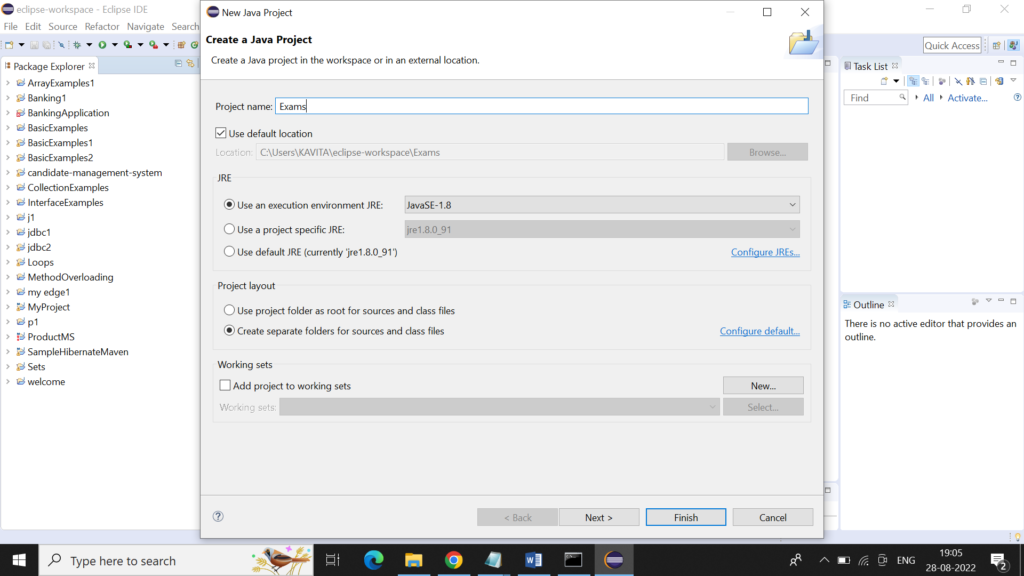
Firstly, launch the Eclipse IDE. After that, create a new Java Project Exams, as shown below.
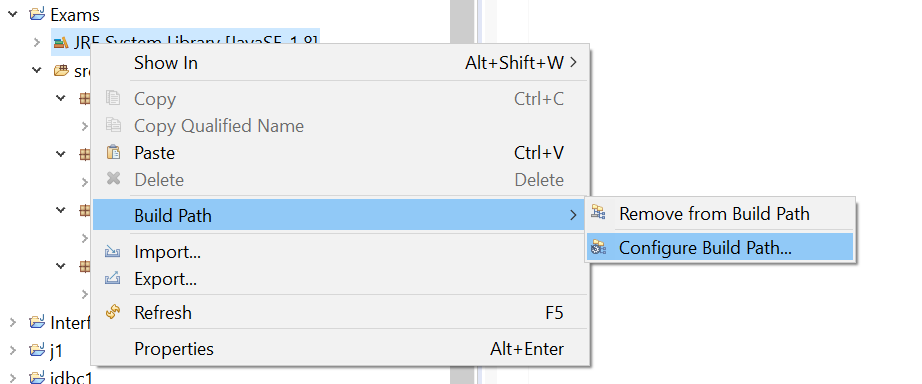
Since we are using Oracle 11g for the database, we need to include the corresponding jar file in the Reference Libraries in the project. For this purpose, right-click on the project name and select the option Build Path. Then select Configure Build Path as shown below.
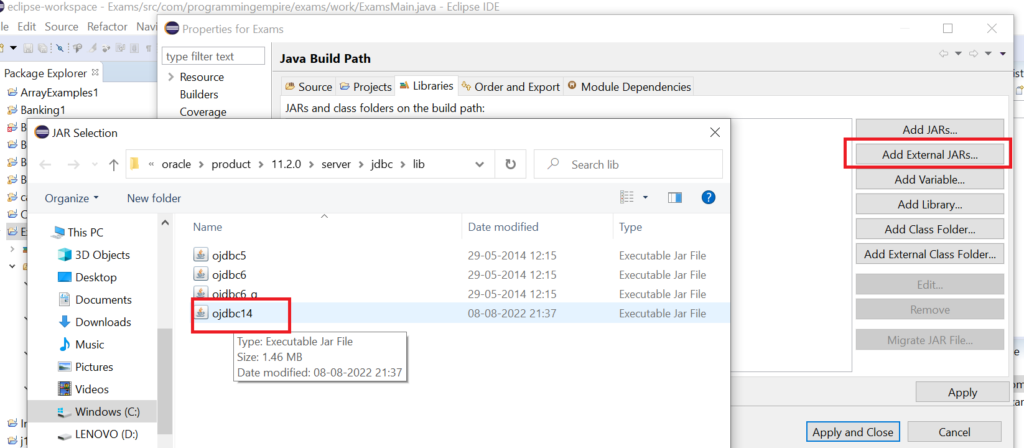
Now click on the option Add External JARs and browse the ojdbc14.jar in your system as shown below.
Now add the following classes to the project. The classes that we will use in this project are given below along with the package names.
| Class Name | Package Name |
| DBUtil | com.programmingempire.exams.util |
| ExamsDAO | com.programmingempire.exams.dao |
| UserBean | com.programmingempire.exams.bean |
| Exams.Main | com.programmingempire.exams.work |
The following image shows the project structure after adding the classes.

Establishing the Connection for Implementing Database Operations Using JDBC
Once the required files are created, write the necessary code in each file. So, open the file DBUtil.java and write the code for establishing connection with the database. The following code shows how to establish the database connection.
package com.programmingempire.exams.util;
import java.sql.*;
public class DBUtil {
	public static Connection getDBConnection()
	{
		Connection con=null;
		try {
			Class.forName("oracle.jdbc.driver.OracleDriver");
			con=DriverManager.getConnection("jdbc:oracle:thin:@localhost:1521:xe", "username", "password");
		}
		catch(Exception e)
		{
			System.out.println(e.getMessage());
		}
		return con;
	}
}
As can be seen in the above code, create an variable con of the Connection type. After that, load the corresponding database driver using the Class.forName() method. Then call the getConnection() method of the DriverManager class that returns the Connection object. Also, you need to provide the userame, and password for Oracle.
Secondly, create a UserBean class. The following code demonstrates it.
package com.programmingempire.exams.bean;

public class UserBean {
	private String userID;
	private String password;
	private String userType;
	private String userName;
	private int incorrectAttempts;
	private int lockStatus;
	public String getUserID() {
		return userID;
	}
	public void setUserID(String userID) {
		this.userID = userID;
	}
	public String getPassword() {
		return password;
	}
	public void setPassword(String password) {
		this.password = password;
	}
	public String getUserType() {
		return userType;
	}
	public void setUserType(String userType) {
		this.userType = userType;
	}
	public String getUserName() {
		return userName;
	}
	public void setUserName(String userName) {
		this.userName = userName;
	}
	public int getIncorrectAttempts() {
		return incorrectAttempts;
	}
	public void setIncorrectAttempts(int incorrectAttempts) {
		this.incorrectAttempts = incorrectAttempts;
	}
	public int getLockStatus() {
		return lockStatus;
	}
	public void setLockStatus(int lockStatus) {
		this.lockStatus = lockStatus;
	}
}
Next we need to write code for database operations. For this purpose, we use the class ExamsDAO.
Further Reading
Understanding Enterprise Java Beans
- AI
- Android
- Angular
- ASP.NET
- Augmented Reality
- AWS
- Bioinformatics
- Biometrics
- Blockchain
- Bootstrap
- C
- C#
- C++
- Cloud Computing
- Competitions
- Courses
- CSS
- Cyber Security
- Data Science
- Data Structures and Algorithms
- Data Visualization
- Datafication
- Deep Learning
- DevOps
- Digital Forensic
- Digital Trust
- Digital Twins
- Django
- Docker
- Dot Net Framework
- Drones
- Elasticsearch
- ES6
- Extended Reality
- Flutter and Dart
- Full Stack Development
- Git
- Go
- HTML
- Image Processing
- IoT
- IT
- Java
- JavaScript
- Kotlin
- Latex
- Machine Learning
- MEAN Stack
- MERN Stack
- Microservices
- MongoDB
- NodeJS
- PHP
- Power Bi
- Projects
- Python
- Quantum Computing
- React
- Robotics
- Rust
- Scratch 3.0
- Shell Script
- Smart City
- Software
- Solidity
- SQL
- SQLite
- Tecgnology
- Tkinter
- TypeScript
- VB.NET
- Virtual Reality
- Web Designing
- WebAssembly
- XML