The following article on How to Work With AWS Management Console, explains AWS Management Console in detail.

Basically, the AWS Management Console is a web-based interface that allows you to manage and interact with various AWS services and resources. It’s designed to provide an intuitive way to configure, deploy, monitor, and control your cloud infrastructure. The following steps show how to work with the AWS Management Console.
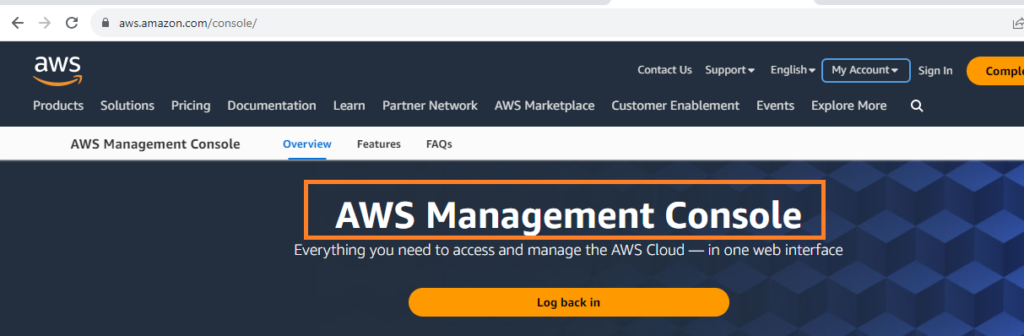
- Sign In. At first, open your web browser and go to the AWS Management Console login page (https://aws.amazon.com/console/). Of course, you need to sign in using the email address and password associated with your AWS account.
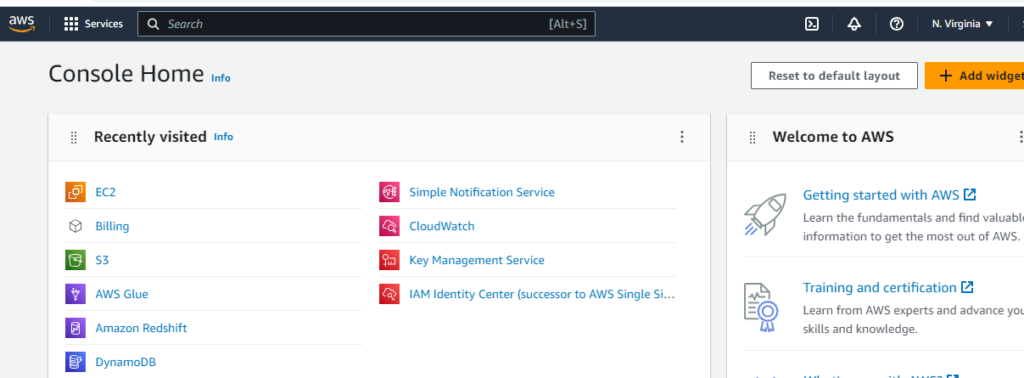
- Dashboard. Once you’re signed in, you’ll land on the AWS Management Console’s dashboard. This dashboard provides an overview of your AWS resources, recent activities, and recommended services. In fact, the layout may vary slightly, but you’ll generally see a navigation menu on the left and various widgets on the main screen.
- Navigation Menu: The navigation menu on the left side of the console provides access to different AWS services categorized by type. Some common categories include Compute, Storage, Databases, Networking, Security, and Management Tools.
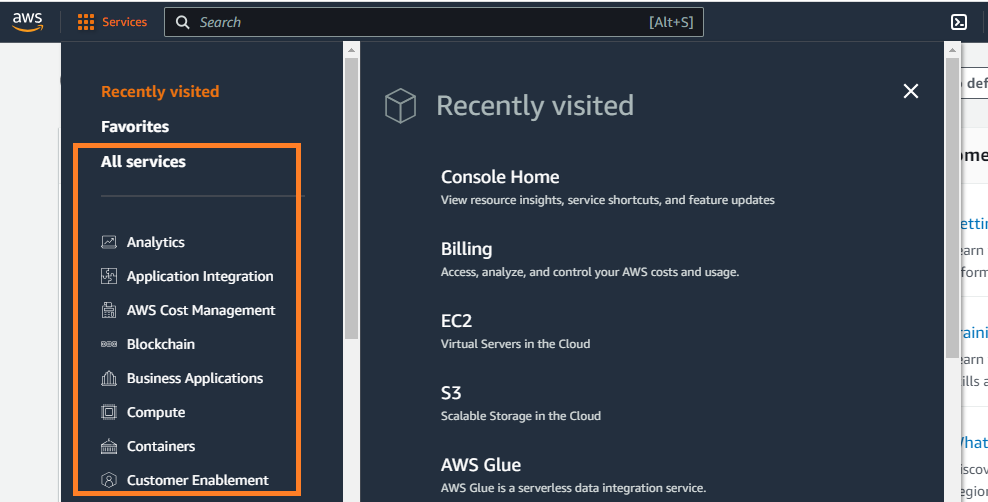
- Service Selection. In order to access a specific service, click on its category in the navigation menu, and then click on the service’s name. For example, to work with Amazon EC2 (virtual servers), you’d click on “Compute” and then select “EC2.”
Service Dashboard
- Service Dashboard. Further, each AWS service has its own dashboard where you can configure settings, create resources, and manage existing ones. so, the dashboard provides an interface tailored to the service’s features and functionalities.
- Creating Resources. In order to create a new resource (e.g., an EC2 instance or an S3 bucket), you usually click a “Create” button or a similar option on the service dashboard. Basically, you’ll be guided through a series of steps to configure the resource according to your requirements.
- Resource Management. Once you have created the resources, they’ll be listed on the respective service dashboard. So, you can click on a resource to view its details, modify its settings, or delete it. Some services also provide tagging options to help you organize resources.
- Monitoring and Logging. Furthermore, many AWS services offer monitoring and logging capabilities. Therefore, you can easily access metrics, logs, and performance data related to your resources. In fact, this information can help you identify issues, optimize performance, and troubleshoot.
- Security and Permissions. Additionally, the AWS Management Console integrates with AWS Identity and Access Management (IAM), which allows you to manage users, groups, and permissions. As a result, you can control who can access specific resources and what actions they’re allowed to perform.
- Billing and Cost Management. Moreover, you can access billing information, set up cost alerts, and view cost breakdowns for your AWS usage. This helps you monitor your spending and stay within your budget.
Important
Remember that the AWS Management Console provides a graphical interface for managing AWS resources. However, AWS also offers command-line interfaces (CLI) and SDKs for different programming languages if you prefer to automate tasks or manage resources programmatically.
Further Reading
What are the Important Components of AWS
Understanding Amazon EC2 and How Does it Work
Features and Benefits of Amazon S3 Bucket
- AI
- Android
- Angular
- ASP.NET
- AWS
- Bootstrap
- C
- C#
- C++
- Cloud Computing
- Competitions
- Courses
- CSS
- Data Science
- Data Structures and Algorithms
- Deep Learning
- DevOps
- Django
- Docker
- Dot Net Framework
- Drones
- Git
- Go
- HTML
- IITM Janakpuri
- IoT
- Java
- JavaScript
- Kotlin
- Latex
- Machine Learning
- MEAN Stack
- MERN Stack
- MongoDB
- NodeJS
- PHP
- Power Bi
- Projects
- Python
- React
- Scratch 3.0
- Smart City
- Software
- Solidity
- SQL
- TypeScript
- VB.NET
- Web Designing
- XML