In this article on Getting Started Your Journey into Cloud With AWS, I will explain the step by step process of creating an AWS account.

Getting Started Your Journey into Cloud With AWS – Setting Up Your AWS Account
- Visit the AWS Website. At first, visit website by entering “https://aws.amazon.com/” in your web browser’s address bar and press Enter.
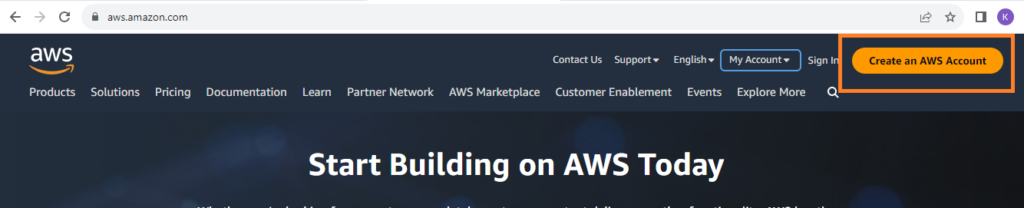
- Click “Create an AWS Account”. On the AWS homepage, you’ll see a button that says “Create an AWS Account.” Click on this button to start the account creation process.
- Signup for AWS. After that, provide your email address and account name. Then verify the email.
- Sign-In Information. Then, fill in your email address and create a password for your AWS account. Also, make sure to choose a strong password that includes a mix of letters, numbers, and special characters.
- Contact Information. Further, enter your name, company/organization name (if applicable), and a contact phone number. Basically, this information is used for account verification and communication.
- Payment Information. After that, provide your credit card information. Basically, AWS uses this information for verification purposes and to charge you for any services that exceed the free tier limits. Furthermore, if you’re concerned about security, AWS also offers the option to pay through invoicing for eligible customers.
- Choose Support Plan. In fact, AWS offers different levels of support plans, including Basic (free) and various paid plans with varying degrees of technical support. So, choose the plan that suits your requirements.
Verification
- Account Verification. Once you are done with the above step, AWS will send you a verification code to the email address you provided. So, enter the code to verify your email.
- Identity Verification. Also, AWS requires identity verification to prevent fraudulent account creation. Hence, you can opt for a Telephone Call or verification code via text message. So, follow the instructions to complete the verification process.
- Accept AWS Customer Agreement. Meanwhile, read through the AWS Customer Agreement, the AWS Service Terms, and the AWS Privacy Notice. Once you’ve reviewed them, select the checkbox to acknowledge that you’ve read and accepted these terms.
- Review and Submit: Additionally, review all the information you’ve provided to ensure accuracy. If everything looks correct, click “Create Account and Continue.”
- Phone Verification: Moreover, AWS may require phone verification to ensure security. So, enter your phone number and choose whether you want to receive the verification code via text message or a phone call. Enter the code you receive to verify your phone number.
- Select a Support Plan (Again). You’ll be prompted to select a support plan again. So, choose the plan you previously selected and click “Continue.”
- Welcome to AWS. Congratulations! You’ve successfully created an AWS account. You’ll receive an email confirming your account creation.
- Sign In to AWS Management Console. Use the email and password you provided during account creation to sign in to the AWS Management Console. This is where you’ll manage your AWS resources and services.
That’s it! You’ve now successfully created an AWS account and can start exploring and using AWS services to build and manage your applications and infrastructure in the cloud.
Further Reading
Cloud Computing with Amazon Web Service (AWS)
What are the Important Components of AWS
Understanding Amazon EC2 and How Does it Work
Features and Benefits of Amazon S3 Bucket
- AI
- Android
- Angular
- ASP.NET
- AWS
- Bootstrap
- C
- C#
- C++
- Cloud Computing
- Competitions
- Courses
- CSS
- Data Science
- Data Structures and Algorithms
- Deep Learning
- DevOps
- Django
- Docker
- Dot Net Framework
- Drones
- Git
- Go
- HTML
- IITM Janakpuri
- IoT
- Java
- JavaScript
- Kotlin
- Latex
- Machine Learning
- MEAN Stack
- MERN Stack
- MongoDB
- NodeJS
- PHP
- Power Bi
- Projects
- Python
- React
- Scratch 3.0
- Smart City
- Software
- Solidity
- SQL
- TypeScript
- VB.NET
- Web Designing
- XML