In this blog, I will explain How to Use EC2 in AWS.
Amazon Elastic Compute Cloud (EC2) is a web service offered by Amazon Web Services (AWS) that provides resizable compute capacity in the cloud. EC2 allows you to create and manage virtual machines (known as instances) on AWS infrastructure. Here’s a step-by-step guide on how to use EC2 in AWS:
Sign Up for AWS
If you’re not already an AWS customer, sign up for an AWS account at https://aws.amazon.com/. You will need to provide payment information, but you can use the AWS Free Tier to get started with EC2 at no cost for the first 12 months.
Access the AWS Management Console
Once you have an AWS account, log in to the AWS Management Console using your credentials.
Select the Region
In fact, AWS has multiple data centers in different geographic regions. So, choose a region where you want to create your EC2 instances. The region you select will affect factors such as latency and data residency. When you log in to AWS Management Console, you will get the option for selecting the region in the top right corner as shown below.

Launch an EC2 Instance
In order to create an EC2 instance, follow these steps.
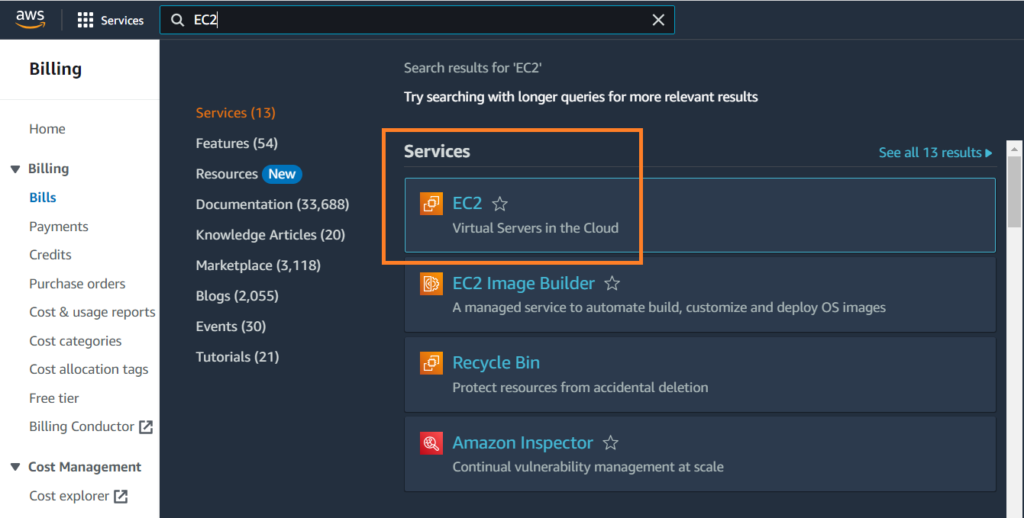
To begin with, in the AWS Management Console, go to the EC2 service by clicking on “Services” and then selecting “EC2” under “Compute.”

Then, click the “Launch Instance” button.

After that, choose an Amazon Machine Image (AMI). Basically, an AMI is a pre-configured template for your virtual machine. You can choose from various Linux and Windows AMIs. So, let us choose Amazon Linux AMI. Also, don’t forget to give a name to your EC2 instance.

Further, choose an Instance Type: Select the hardware configuration of your instance, including CPU, memory, storage, and network performance. The t2.micro instance is often used for free tier purposes.

Then, configure Instance Details. For this purpose, set instance details such as the number of instances, network settings, and user data (optional). After that, add Storage. Here you can configure the storage for your instance. Basically, you can add or modify the size and type of the root and additional volumes.

Next, assign key-value pairs to your instances for better organization.

So, provide the key pair name, and keep the default options selected.

When you click on Create Key Pair button, the corresponding pem file is downloaded.

Next, configure Security Groups. Define the rules that control inbound and outbound traffic to your instance. So, let us keep the default options.

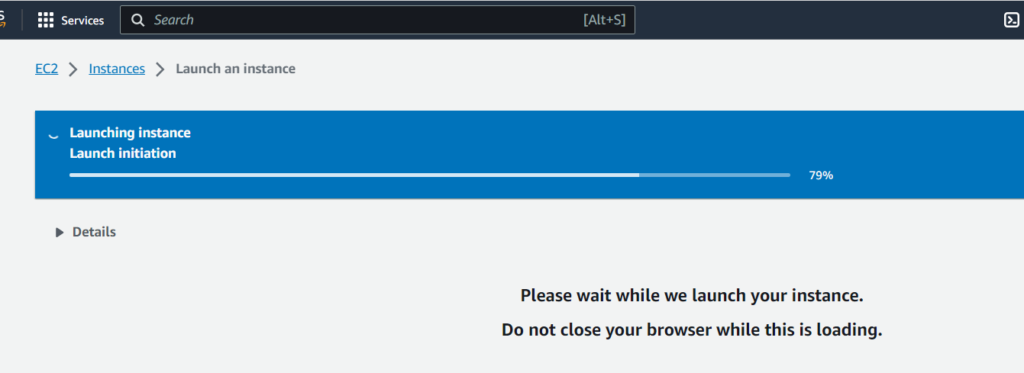
Finally, our configuration for the EC2 instance is complete. Once again review the configuration settings, and then click “Launch.”

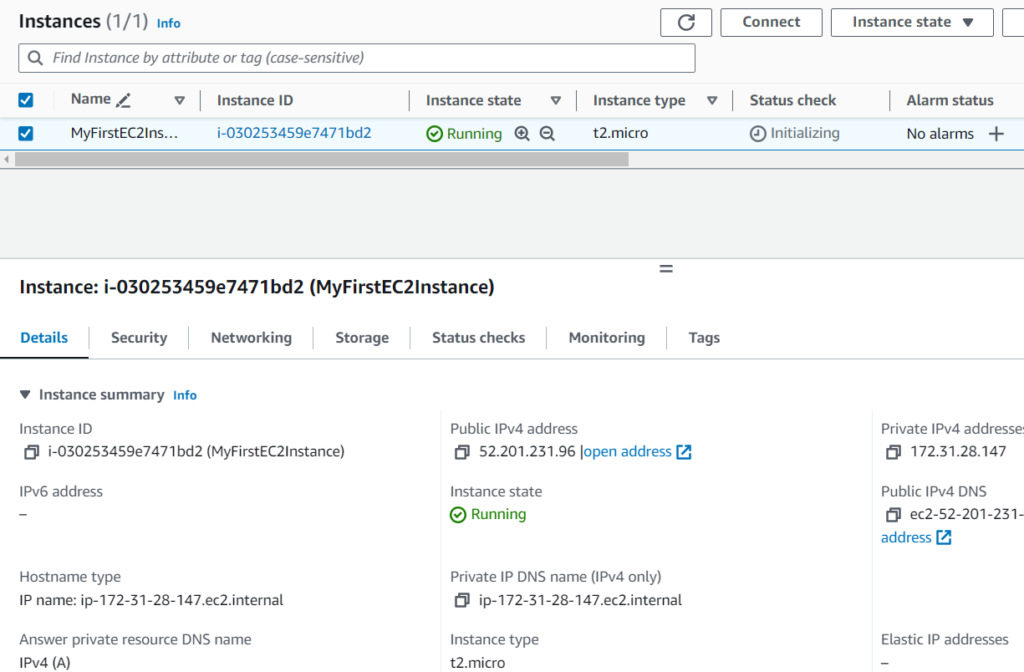
Our instance is running as shown in the instances tab.

When you select the instance, its details are visible.

Connect EC2 Instance Using SSH
In order to connect the EC2 instance through SSH, first download and install the PuTTY Key Generator. For the purpose of accessing your machine, you need a private key ppk file. The file which is downloaded earlier is a .pem file. In order to convert a pem file to a ppk file, we use the PuTTY Key Generator. Since we need a ppk file rather than a pem file, we need this tool. Here, we need to create or select an existing key pair to connect securely to your instance.

Open the PuTTY Key Generator, click on Load, and browse the pem file. Then, click on the Save private key and save the ppk file for connecting with your Linux instance.

Also, you need to install PuTTY to create a connection with the EC2 instance using SSH. So, after installing, open your putty, copy the host name as public IPv4 DNS address, and click on SSH -> Auth -> Credentials, and under auth browse the ppk file. You will be able to connect with your Linux instance.


Now you can log in as an ec2-user by providing the passphrase that you have given in the PuTTY Key Generator.

Manage Your EC2 Instances
You can start, stop, terminate, and perform other management actions on your EC2 instances from the AWS Management Console. Let us create a directory before stopping the instance.

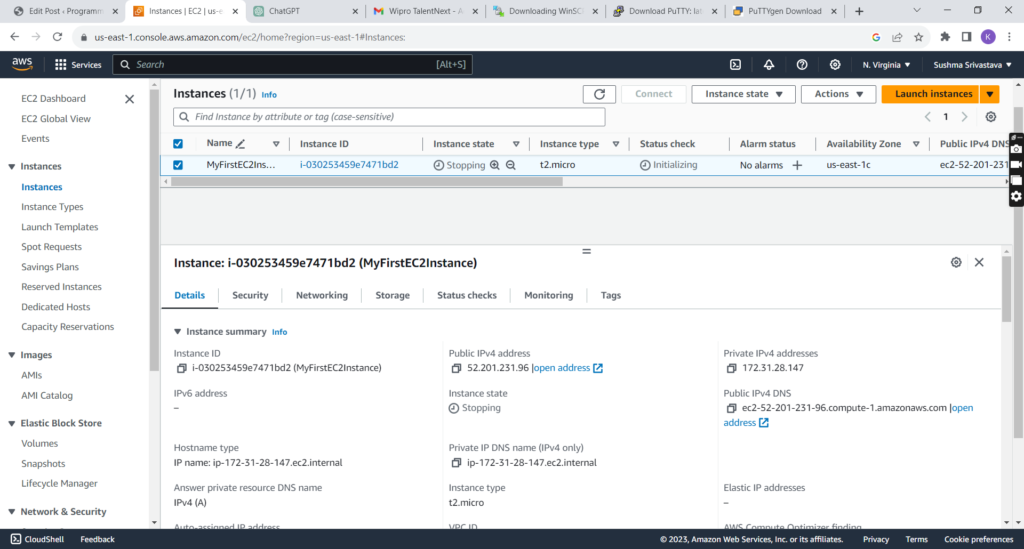
Then, stop the instance.


Now start the instance again. These options are available in the Instance State tab.

You can see that a new public IPv4 address is assigned this time.

Once again connect using PuTTY.

Navigate to the folder that you have created earlier.

Lastly, terminate the instance.

Conclusion
In conclusion, using Amazon EC2 in AWS provides flexibility, scalability, and the ability to run virtual machines in the cloud to meet your computing needs. Be mindful of costs and security while working with EC2 instances, and always follow AWS best practices and recommendations
Further Reading
What are Spot Instances in AWS?
How to Create Permission Policies in AWS?
How to Create an AWS Spot Instance?
GetObject and PutObject Permissions in Amazon S3
Which Front End Technology is Better: Angular or React?
20+ Interview Questions on Go Programming Language
100+ MCQs On Java Architecture
How to Deploy a Machine Learning Model?
How to Read Data from Amazon DynamoDB using AWS Lambda?
An Example of Auto Scaling Using AWS Lambda
How to Create a Web Application Using a Trained Machine Learning Model?
- Angular
- ASP.NET
- C
- C#
- C++
- CSS
- Dot Net Framework
- HTML
- IoT
- Java
- JavaScript
- Kotlin
- PHP
- Power Bi
- Python
- Scratch 3.0
- TypeScript
- VB.NET
