In this blog, I will explain How to Create a Window in Tkinter.

Creating a window (also known as a root window) in Tkinter is the first step in building a graphical user interface (GUI) for your Python application. Here’s how you can create a simple window using Tkinter.
import tkinter as tk

# Create a root window
root = tk.Tk()

# Set the title of the window
root.title("My Tkinter Window")

# Set the dimensions of the window (optional)
root.geometry("400x300")  # Width x Height

# Add widgets, such as labels, buttons, etc., to the window (optional)

# Display the window
root.mainloop()
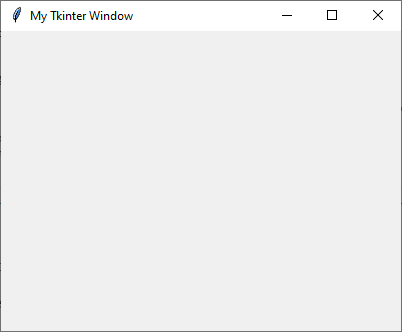
Output
Let’s break down the code:
- We import the
tkintermodule and alias it astkfor convenience. - We create a root window using the
Tk()constructor, which represents the main window of the application. - We set the title of the window using the
title()method. This title will be displayed in the window’s title bar. - Optionally, we can set the dimensions of the window using the
geometry()method. The dimensions are specified in the format"widthxheight", wherewidthandheightare integers representing the width and height of the window in pixels. - Optionally, you can add other widgets, such as labels, buttons, etc., to the window before displaying it.
- Finally, we start the Tkinter event loop using the
mainloop()method of the root window. This method listens for events (such as button clicks, mouse movements) and keeps the window open until the user closes it.
When you run this code, it will create a simple window with the specified title and dimensions. You can then add more widgets and functionality to the window to create a complete GUI for your application.
Further Reading
How to Perform Dataset Preprocessing in Python?
How to Use Generators in Python?
Features and Benefits of Tkinter
- Angular
- ASP.NET
- C
- C#
- C++
- CSS
- Dot Net Framework
- HTML
- IoT
- Java
- JavaScript
- Kotlin
- PHP
- Power Bi
- Python
- Scratch 3.0
- TypeScript
- VB.NET