Programmingempire
This article demonstrates a Database Record Navigation Example Using ADO.NET. The following example uses VB.NET. While the C# code is available here. Basically, .NET Framework provides the ADO.NET library that comprises classes and methods for connecting the application with a database and performing various operations on it.
Creating Database in SQL Server
At first, start Visual Studio and create a Windows Forms application in VB.NET. The following application is created using Visual Studio 2019.
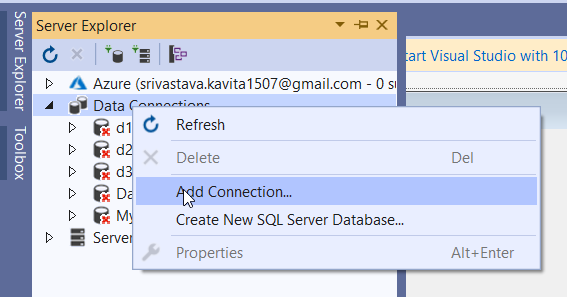
Once, the application is created, select Server Explorer from the View menu. Now click on the Server Explorer and then right-click on the Add Connection option. The following figure demonstrates it.
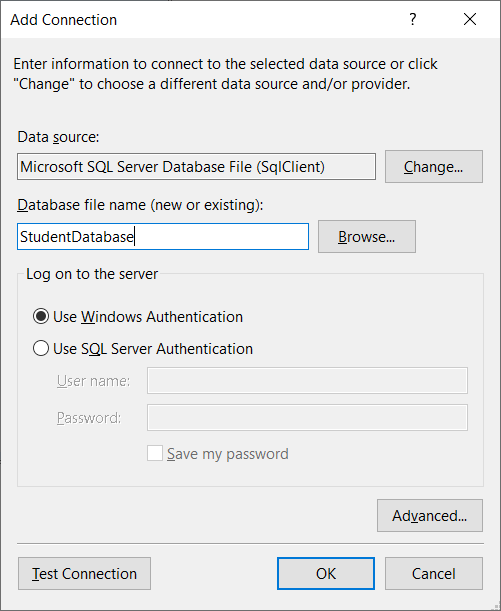
After that, specify the name of the database and click on OK as the following figure shows.
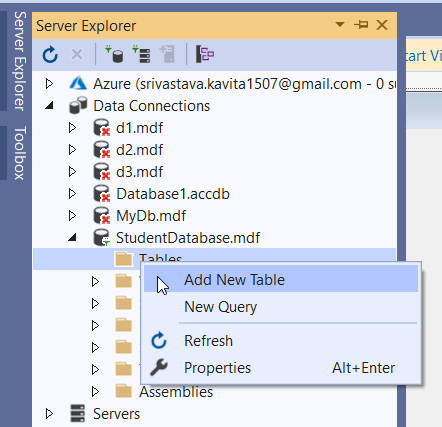
If the database doesn’t exist, click on the “Yes” option to create it. Now the database is visible in the Server Explorer. Further, expand the database and click on the Tables folder. After that right-click on the Add New Table option. The following figure demonstrates it.
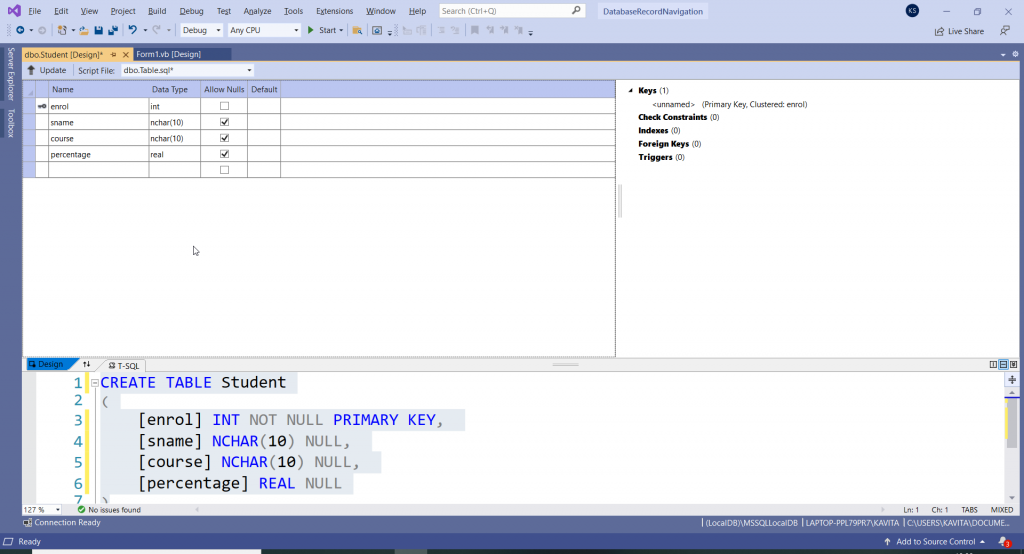
Further, create a new table as shown in the figure.
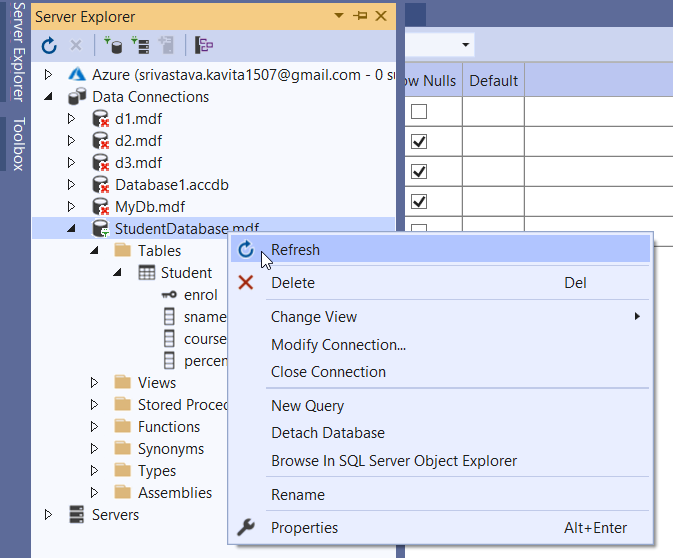
Now click on the Update button and then click on the Update Database. When you click on the Refresh option in the Server Explorer, the database table becomes visible as shown below.
Creating a Database Table
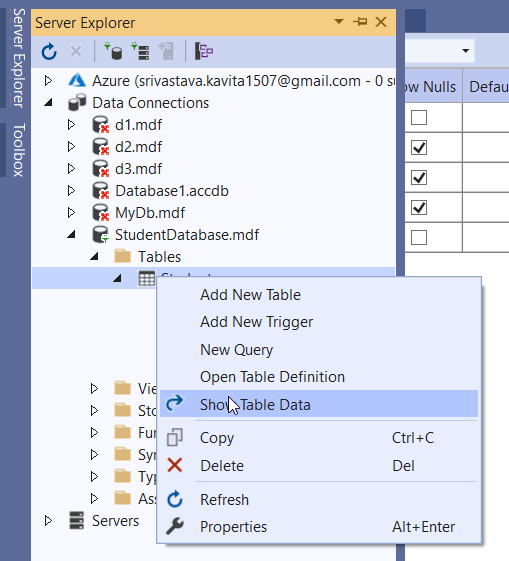
After that right-click on the Student table and select the option Show Table Data. The following figure shows it.
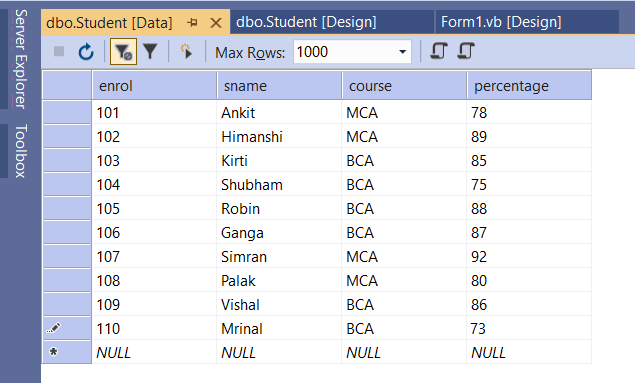
Once the database table opens, add some records, save the table data and close it.
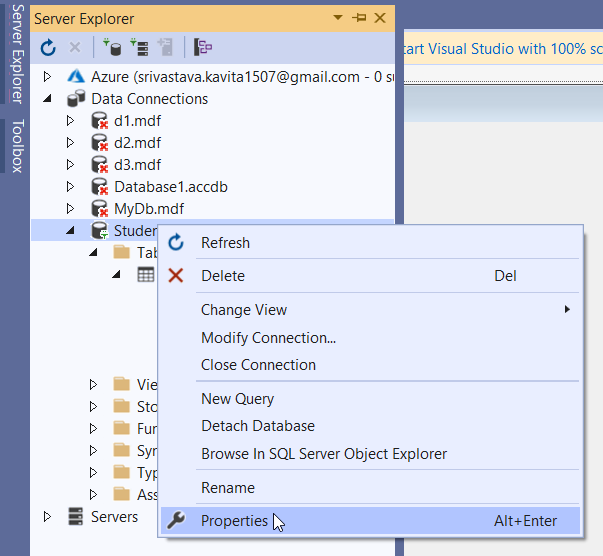
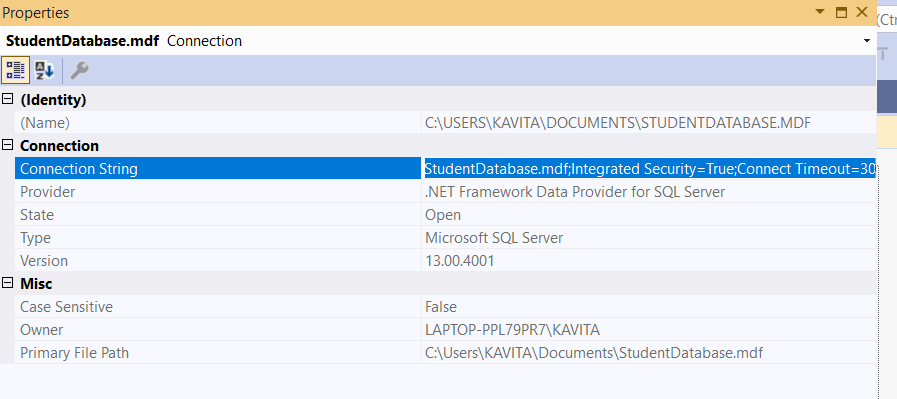
Further, right-click on the database in Server Explorer and click on the Properties option as shown below.
Now select the value of the Connection String property and copy it. When we create a Connection object, we need to specify the connection string. Therefore, we will use the value of the connection string in the code.
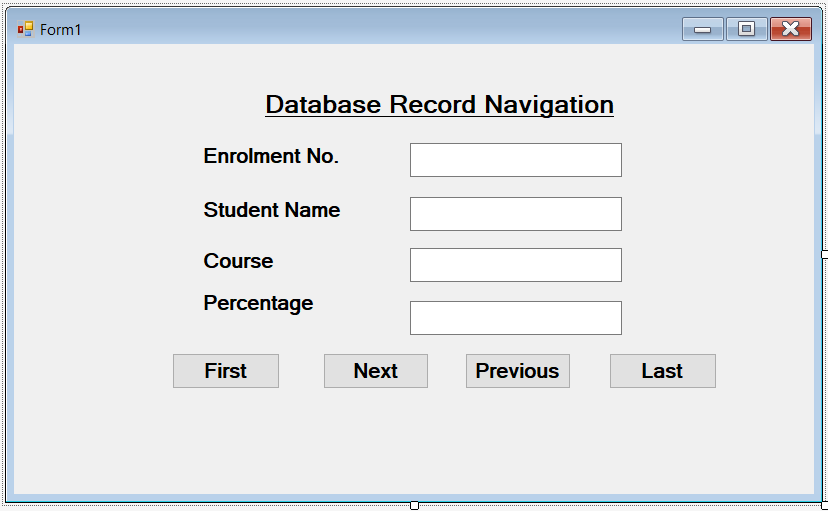
Design a Form for Database Record Navigation Example
Once our database is ready, we can develop the application. Therefore, we can start with the Form Design. The following figure shows the Form for Database Record Navigation Example.
Complete Code
After that, click on the form and write the code for connecting with the database and the corresponding buttons.
Imports System.Data
Imports System.Data.SqlClient
Public Class Form1
    Dim con As SqlConnection
    Dim da As SqlDataAdapter
    Dim ds As DataSet
    Dim i As Integer = 0
    Dim n As Integer
    Private Sub Form1_Load(sender As Object, e As EventArgs) Handles MyBase.Load
        con = New SqlConnection("Data Source=(LocalDB)\MSSQLLocalDB;AttachDbFilename=C:\Users\KAVITA\Documents\StudentDatabase.mdf;Integrated Security=True;Connect Timeout=30")
        con.Open()
        da = New SqlDataAdapter("select * from Student", con)
        ds = New DataSet()
        da.Fill(ds, "Student")
        n = ds.Tables("Student").Rows.Count
        Dim dr As DataRow
        dr = ds.Tables("Student").Rows(0)
        TextBox1.Text = dr(0).ToString
        TextBox2.Text = dr(1).ToString
        TextBox3.Text = dr(2).ToString
        TextBox4.Text = dr(3).ToString
    End Sub
    Private Sub Button1_Click(sender As Object, e As EventArgs) Handles Button1.Click
        Dim dr As DataRow
        dr = ds.Tables("Student").Rows(0)
        TextBox1.Text = dr(0).ToString
        TextBox2.Text = dr(1).ToString
        TextBox3.Text = dr(2).ToString
        TextBox4.Text = dr(3).ToString
    End Sub
    Private Sub Button4_Click(sender As Object, e As EventArgs) Handles Button4.Click
        Dim dr As DataRow
        dr = ds.Tables("Student").Rows(n - 1)
        TextBox1.Text = dr(0).ToString
        TextBox2.Text = dr(1).ToString
        TextBox3.Text = dr(2).ToString
        TextBox4.Text = dr(3).ToString
    End Sub
    Private Sub Button2_Click(sender As Object, e As EventArgs) Handles Button2.Click
        Dim dr As DataRow
        If (i = n - 1) Then
            Button4.PerformClick()
        Else
            i = i + 1
            dr = ds.Tables("Student").Rows(i)
            TextBox1.Text = dr(0).ToString
            TextBox2.Text = dr(1).ToString
            TextBox3.Text = dr(2).ToString
            TextBox4.Text = dr(3).ToString
        End If
    End Sub
    Private Sub Button3_Click(sender As Object, e As EventArgs) Handles Button3.Click
        Dim dr As DataRow
        If (i = 0) Then
            Button1.PerformClick()
        Else
            i = i - 1
            dr = ds.Tables("Student").Rows(i)
            TextBox1.Text = dr(0).ToString
            TextBox2.Text = dr(1).ToString
            TextBox3.Text = dr(2).ToString
            TextBox4.Text = dr(3).ToString
        End If
    End Sub
End Class
Output

- Angular
- ASP.NET
- C
- C#
- C++
- CSS
- Dot Net Framework
- HTML
- IoT
- Java
- JavaScript
- Kotlin
- PHP
- Power Bi
- Python
- Scratch 3.0
- TypeScript
- VB.NET
