This article on Installing WAMP Server provides instructions on installing WAMP server on Windows.

Step By Step Instructions on Installing WAMP Server on Windows
- To begin with, first of all download the WAMP Server from its website. According to the configuration of your PC, you can either choose 64 BITS download or 32 BITS download.
- Once, you download it, double click on the downloaded file. It will start the installation.

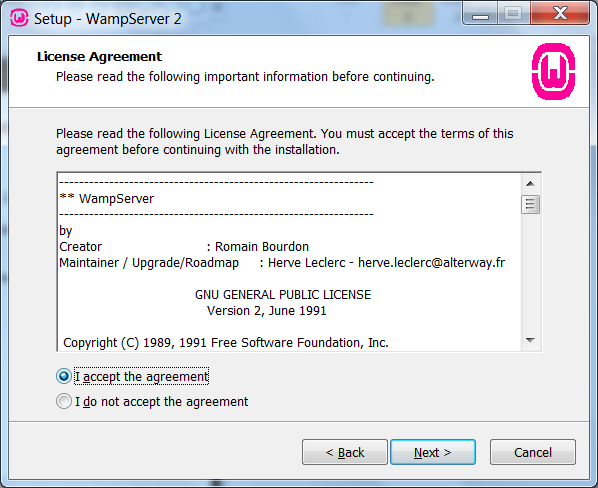
- Click on Next. On the next screen accept the license agreement.
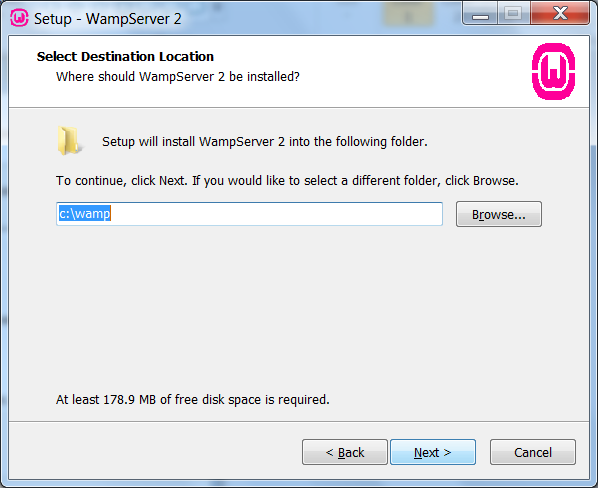
- Click on Next. When the next screen appears, provide the installation folder.
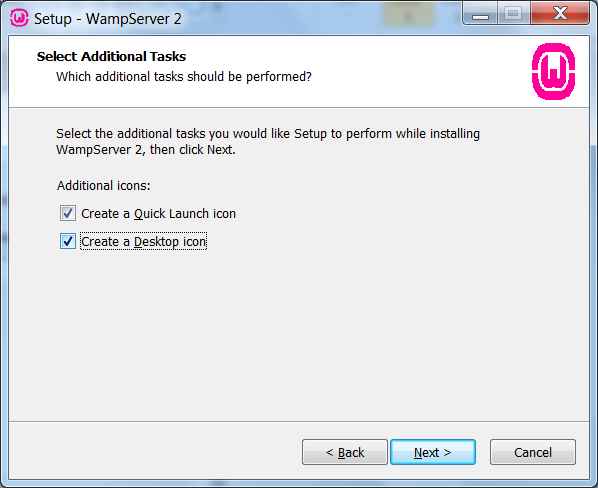
- Click on Next and check the Quick Launch Icon and Desktop Icon checkboxes.
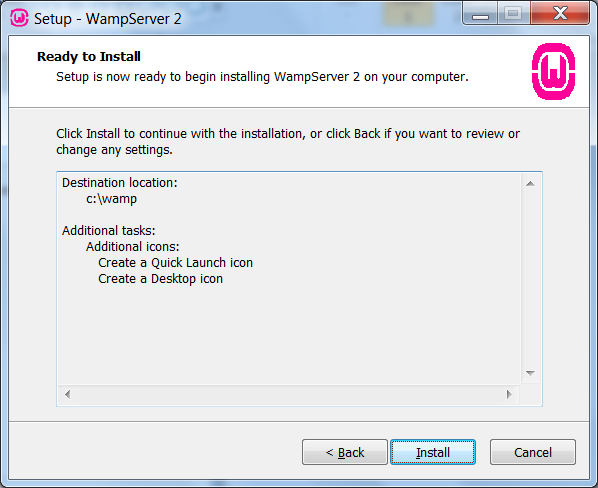
- When the next screen appears, click on Install.
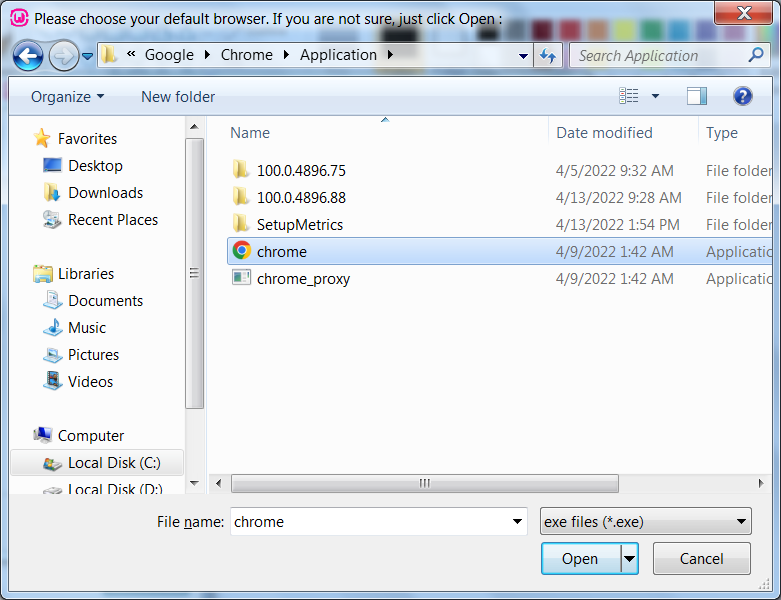
- Once the installation finishes, select the default browser.
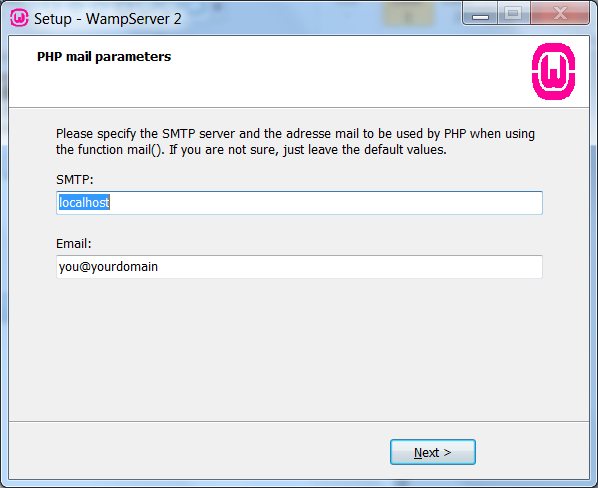
- After that, specify the SMTP server and the addressee mail. For now, you can leave the default values.
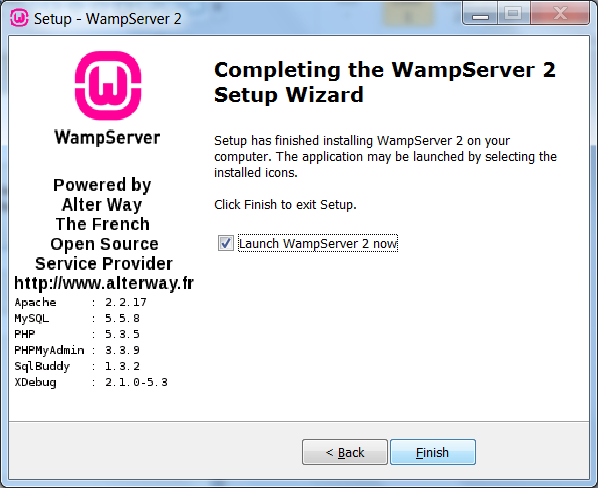
- Once the installation is complete, you will get the following screen. Now you can launch the WAMP Server.
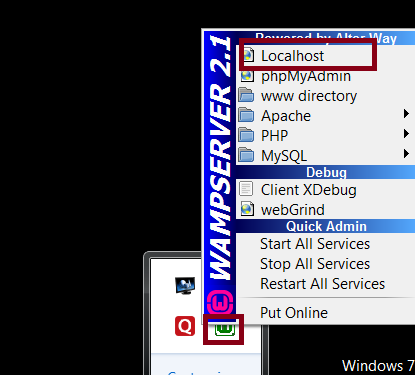
- So, you will get a green icon of the installed WAMP server on the bottom right corner of the desktop.

- Further, click on the WAMP Server icon and then click on the localhost.
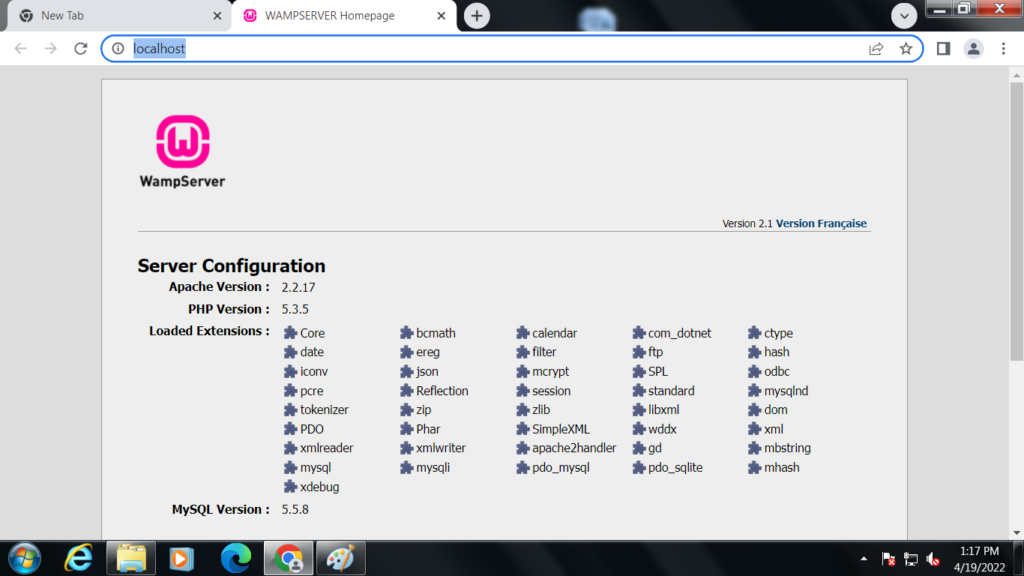
- If the WAMP Server is running properly, you will get the following screen.
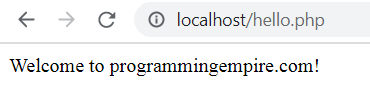
- Since, now the WAMP server is successfully installed, let us create a simple PHP program. We need to save the program in a folder under the www folder.
<?php
   echo 'Welcome to programmingempire.com!';
?>
Now save the file as hello.php and open it as given below.
Further Reading
Examples of Array Functions in PHP
Registration Form Using PDO in PHP
- Angular
- ASP.NET
- C
- C#
- C++
- CSS
- Dot Net Framework
- HTML
- IoT
- Java
- JavaScript
- Kotlin
- PHP
- Power Bi
- Python
- Scratch 3.0
- TypeScript
- VB.NET